Google Merchant Center is a digital platform that you can use as an online retailer to upload product listings for Google Shopping Ads.
All products you see while browsing the Shopping tab in Google have been uploaded via the Google Merchant Center feed. But only a portion of those listings are paid ads – a large part of the screen is occupied by free listings that you can take advantage of.
This article will explain how you can start displaying your products in Google Shopping for free using Google Merchant Center. I will also share some best practices so you can make the most out of the free product listings feature on Google and boost your organic traffic.
Which websites should use Google Merchant Center?
Google Merchant Center is all about products. Therefore, you need to have products to sell if you wish to benefit from using the platform.
Hence the types of websites that should consider using Google Merchant Center include:
- eCommerce stores – Google Merchant Center can make products more accessible for users since they will see them directly in the search results before deciding to visit your website. Moreover, if a website owner uses the Buy in Google feature, products can even be purchased directly from Google’s search results!
- Local stores that don’t offer internet purchases. This might come as a surprise, but with Google Merchant Center, you can also list products available in a local store (not an eCommerce one) on the local market. Such products can also be shown in SERPs.
How can your website benefit from Google Merchant Center?
While Google Merchant Center is targeted towards advertisers, you can still use its features to improve your organic rankings.
Key benefits of using Google Merchant Center include:
- The ability to display products on free listings on Google,
- The option for displayed products to be purchased directly on Google (via “Buy in Google”).
As a result, your products can be more visible in search results, giving users easier access to them, which might positively impact your sales.
Where is Google Merchant Center available?
Currently, features provided by Google Merchant Center are available for users from the following countries:
Argentina, Australia, Austria, Belgium, Brazil, Canada, Chile, Colombia, Czech Republic, Denmark, Finland, France, Germany, Greece, Hong Kong, Hungary, India, Indonesia, Israel, Italy, Japan, Malaysia, Mexico, Netherlands, New Zealand, Norway, Philippines, Poland, Portugal, Republic of Korea, Romania, Russia, Saudi Arabia, Singapore, Slovakia, South Africa, Spain, Sweden, Switzerland, Taiwan, Thailand, the UK, the US, UAE, Ukraine, and Vietnam.
Types of free product listings in Google Merchant Center
Products submitted to Google Merchant Center can appear as free product listings on Google Search.
Free product listings can be divided into three types:
Shopping tab listings
The Shopping tab of Google Search has been created specifically for displaying products sent via Google Merchant Center.
In other words, you need to opt-in via the Google Merchant Center account to show your products in this section of Google’s search results.
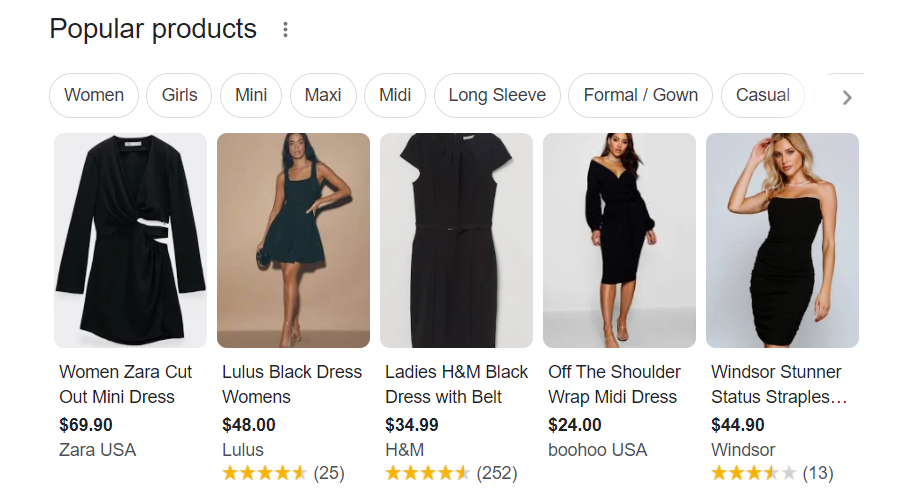
The Shopping tab consists of slots dedicated to ads (paid listings), while the free listings appear under the Ads carousel:
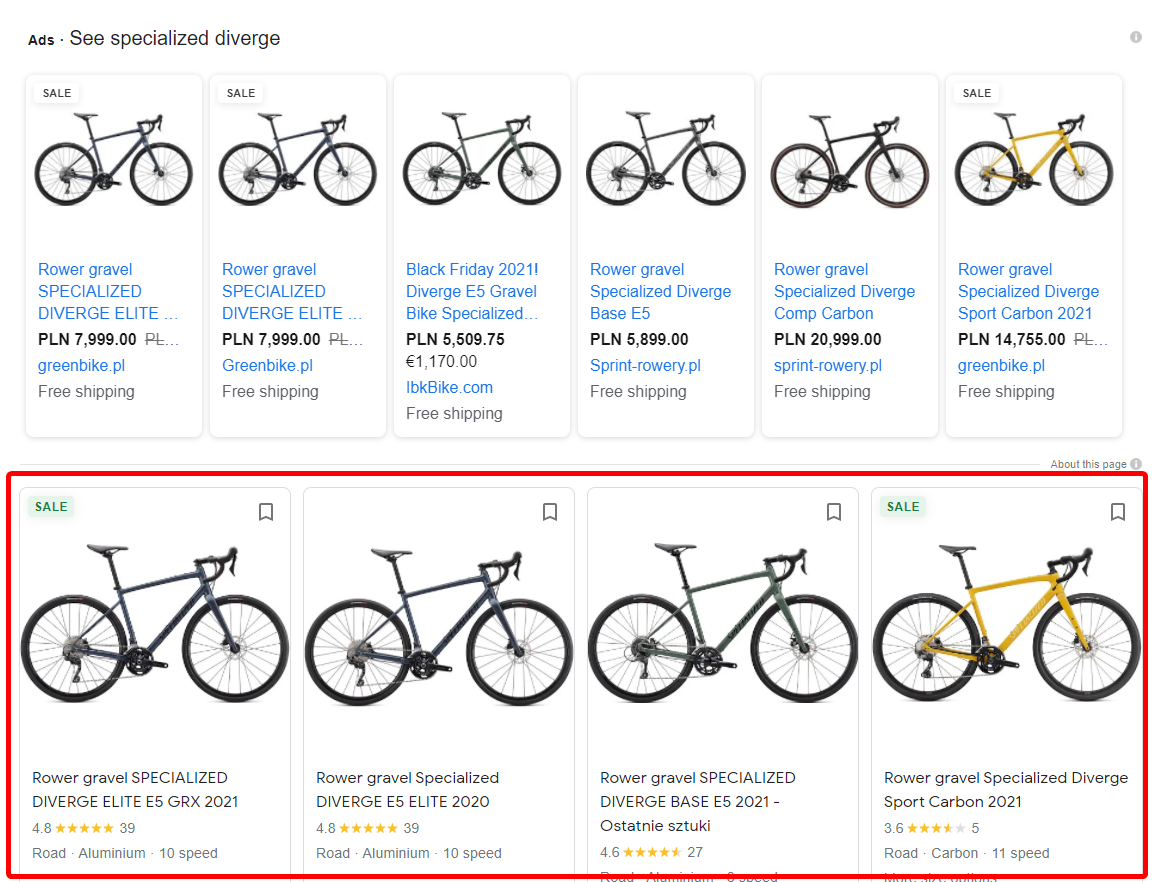
Listings can display product attributes including price, availability, ratings, and brand annotations, directly in search results.
If you are using Google Merchant Center, your in-store products from a local store could also appear as free listings in the Shopping tab.
Additionally, your listing could include store hours, directions, phone number, product price, product availability, and even the approximate distance from the user.
Google Search (google.com)
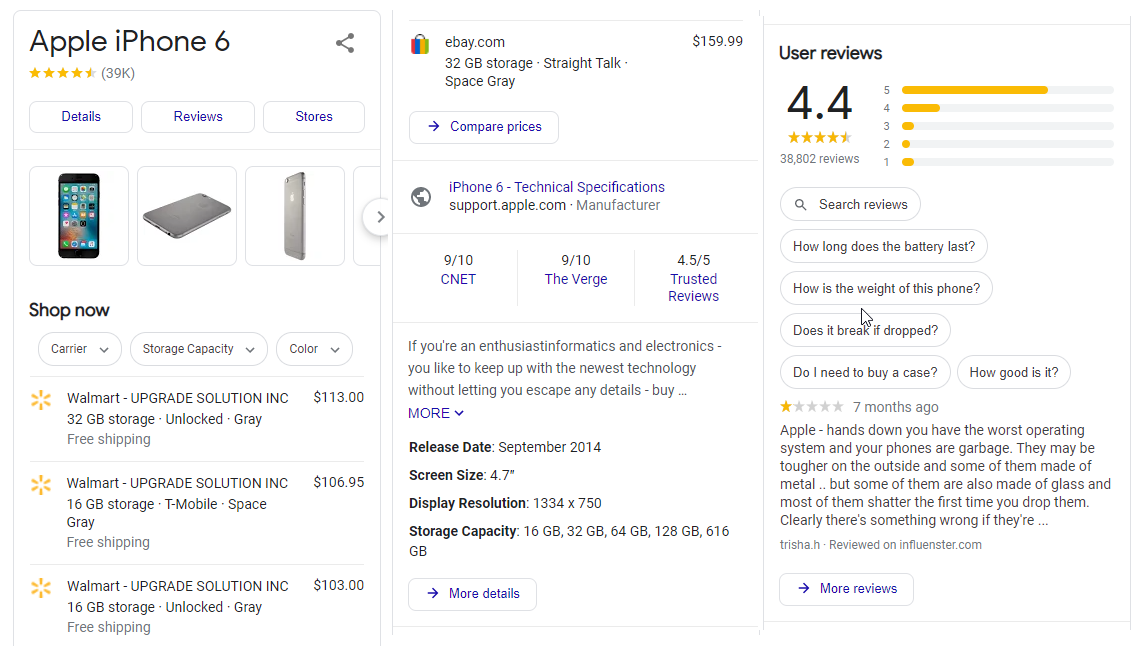
In general, product attributes in Google Search results (the All tab on a Google search result page) help product pages become eligible to appear as rich results. Such results can then display helpful details about a given product as part of a search listing.
Google can enrich search results using the data from the Google Merchant Center feed and structured data markup found on the website.
As Google’s documentation states:
Google Images (images.google.com)
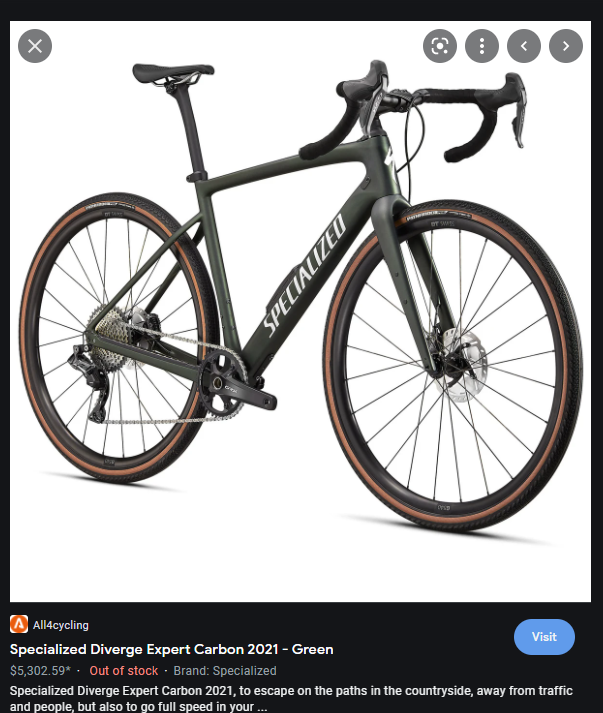
Data provided via Google Merchant Center feed can also appear in the Images search tab.
Moreover, product attributes, including the price, availability, ratings, and brand, can show directly by the images in SERPs, as well as on the view of the expanded image.
Visitors on mobile devices can also use the Google Lens feature to display similar products. These products can utilize the data provided via Google Merchant Center data to show additional product attributes.
How to appear on free product listings in Google Merchant Center?
The first step to displaying your products as free listings is setting up a Google Merchant Center account.
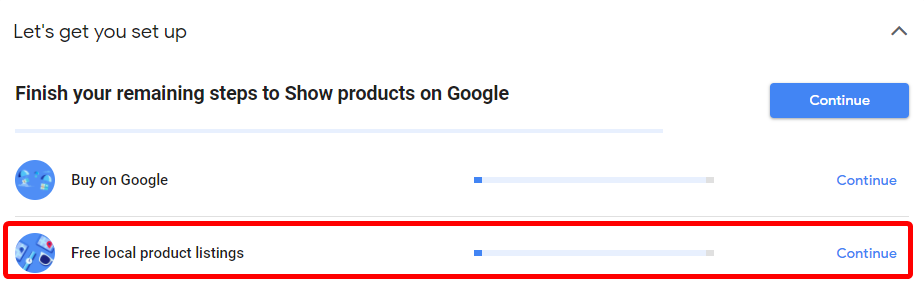
Then, on the platform’s main page, you will find a Free local product listing section.
Click “Continue” to start setting up your products. You can also find this feature in the navigational menu by navigating to Programs and selecting Show your products in free product listings on Google.
You will have to complete several mandatory steps to finish the setup process.
Let’s go through them one by one.
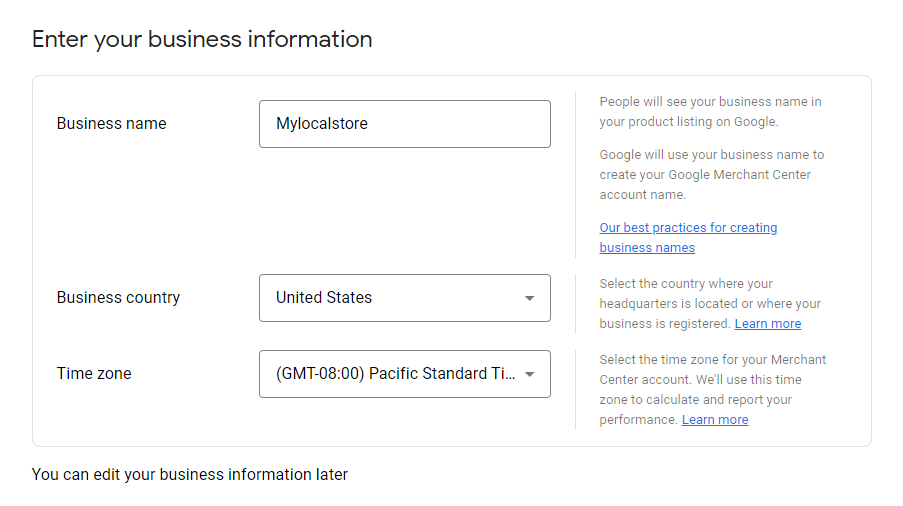
Add your business information and verify your phone number
You need to add more information about the business, including the full address and the phone number.
Choose your customers’ check-out settings
In this step, you will configure check-out options for your customers.
You can choose more than one option, and you will be able to change this setting later in your Merchant Center account configuration if necessary.
Here are the available options.
On your website
In this case, users that will see your products directly in Google will have to go to your website to buy them.
On Google
This feature enables users to purchase the product directly in search results without visiting the website. But, of course, users can still proceed to the website if they prefer to.
At your local store
This option is suitable for local stores that don’t sell their products online. In this case, Google users will see your product on Google but will have to go directly to your local store to buy it.
You can learn more about Merchant Center’s checkout options from Merchant Center documentation.
Create and register a product feed
Next, you need to send product data to Google using Google Merchant Center product feed – this is a mandatory step.
Feeds can be found inside the Products section of Google Merchant Center.
Every new feed has to be registered first. Once registered, it can be updated without needing to register again.
Your primary feed is the central data source that Google Merchant Center uses to access and display your product data.
You can use it to:
- add or remove product data,
- set language and country targeting,
- set feed rules for your product data.
Note:
Google recommends submitting all of your products in a single primary feed. If you need to exclude products, use the excluded_destination attribute.
You can also create a supplemental feed that will provide additional product data to your primary feed or feeds. However, a supplementary feed can’t be used as a standalone feed, nor can it be used to add or remove products.
Since a properly created feed is essential for your free listing product performance, further in the article I will summarize important best practices that apply to feed data.
I also encourage you to visit the Google Merchant Center documentation about product feeds.
Verify your website
Before you are able to take full advantage of what Google Merchant Center has to offer, you will need to verify ownership of your website.
According to Google, you can use one of the following methods:
Choose this if: You’re able to add HTML code to the index page on the site you want to verify. Select this if: You can add new files to the server behind the site you want to verify. Pick this if: You’re an account-level administrator for Google Tag Manager. Choose this if: You have admin access to a Google Analytics account that is already linked to the site you want to verify (this method might not work if you use a third-party platform such as Shopify).
Finalize the setup
At the end of the process, you will be asked to review your company information and Google’s policies on unsupported content, after which you will see the option to add your tax information and set up shipping.
The last thing to do is click the “Activate” button, and your products will be ready to show up on free listings.
Additional considerations for creating a Google Merchant Center product feed
A properly constructed feed is the most critical part of the whole setup.
Products not included in a Google Merchant Center feed won’t be eligible to show up as free Shopping listings on Google.
To help you avoid any mistakes in displaying your products on free listings, I’ve prepared a brief overview of the best practices for creating a feed. Some of these steps can also help you enhance your product visibility in SERPs.
Feed format
For creating your feed, you should use one of the following file formats:
- A delimited text file (CSV/TSV) is easy to generate but will have to be re-uploaded every time any content changes. This option is suitable for smaller sites without a large product base.
- An XML file can be generated automatically if connected to your product database, making it suitable for huge eCommerce stores with hundreds of products. Also, your website probably already uses a database to generate XML product sitemaps, so implementing a feed in this format might be the better choice.
Uploading a product feed
When uploading your data feed to Merchant Center, you have the following upload options available:
- Direct upload
- FTP upload
- SFTP upload
- Scheduled fetches
- Upload via Google Cloud Storage
- Content API (Advanced)
Once you have uploaded a data feed, you may also create a schedule to update the feed automatically.
Also, remember that if you’re submitting a compressed file, it must be under 4 GB. In case of a file larger than 4 GB, you should split it into multiple smaller files before uploading.
You can review your feed in the Products > Feeds section in the Google Merchant Center.
Registering a product feed
When registering your feeds, keep the following practices in mind:
- Submit your entire product inventory in your product data feed to maximize the exposure potential in free listings.
- Ensure your feed includes free listings as the destination.
Follow these steps:
- Sign in to your Merchant Center account.
- Select “Products” in the main navigation menu on the left.
- Click on “Feeds” to see settings for your different feeds.
- In the “Destination” column, you should see “Free product listings.”
- If you’ve not opted in, select “Growth” and manage programs in the left navigation menu. Then, click the feature card, and follow the instructions.
Product attributes in product feeds
The minimum required attributes to show your inventory on Google for free are:
However, there are many more attributes that you can include.
While not all are mandatory, following the below-mentioned practices will help you maximize the potential of your product feed when it comes to displaying products in SERPs:
Use product identifiers
For listings of specific products, it’s best to include at least one of these in your product data:
- Global Trade Item Numbers (GTIN)
Note: Submit these for all products for which GTINs exist.
- Brand and Manufacturer Part Numbers (MPN)
IMPORTANT! Since November 2021, all products require a combination of unique product identifiers. If these required attributes (GTIN [gtin], MPN [mpn], and/or brand [brand]) are not provided, your products will remain eligible to show up, but their performance may be limited.
Use product data attributes
The following attributes can help you specify different product variants:
- Item group ID [item_group_id]: Group product variants in your data.
- Color [color]: Submit the primary color of your product. If your product has variants that vary by color, use the Item group ID [item_group_id] attribute to submit each of your variants by color.
- Size [size]: Use these attributes to specify the standardized size of your product. If your product has variants that vary by size, use the Item group ID [item_group_id] attribute to submit each of your variants by size.
- Pattern [pattern]: Use this to describe your product’s design or graphic print. If your product has variants that vary by pattern, use the Item group ID [item_group_id] attribute to submit each of the variants.
- Material [material]: Indicate the primary materials used in the central part of your product, as customers often search for products by material (for example, “leather jackets”).
Add recommended attributes
By using them, you can help Google match your product data with user queries:
- Availability [availability]: Without this attribute, your products may not appear in all search results!
- Google Search Index [canonical_link] ensures your products are associated with the correct URL in Google’s Search index and prevents Google from indexing URLs with additional parameters.
- Suppose you include specific prices in your Merchant Center feed (use the price [price] attribute) or in schema.org markup (Offers). In this case, any price drops based on the historical running average of your product’s pricing may appear in your listings.
Add demographic and optional attributes
They can enhance product visibility in SERPs:
Define demographic attributes
- Gender [gender]: Use this attribute to specify which gender your product is designed for or submit “unisex.”
- Age group [age_group]: Use this attribute to indicate which demographic your product is designed for.
Submit additional optional attributes
- Size type [size_type], size system [size_system]: Use these attributes to help further specify the standardized size of your product.
- Condition [condition]: Use this attribute to help customers understand whether your product is used or new.
- Multipack [multipack]: Use this attribute to indicate if your product is multiple, identical items grouped as one product (“10 pairs white cotton socks”).
Use case examples:
- Google uses gender in combination with size attributes. For example, a t-shirt with “male” and “kids” could be used to display a “boys’ t-shirt.”
- Google uses age group in combination with gender. Here is an example: you can submit the value of “women’s” when referring to an adult who is a female and the value of “girls’” for a child.
Images in product feed
To ensure images are displayed correctly in search results, make sure the image attributes in your product feed adhere to the mentioned practices:
- Submit product images in high resolution and quality in the image link [image_link] and additional image link [additional_image_link] attributes.
- Image link [image_link] – submit URLs to high-resolution product images to improve your chances of capturing the customer’s attention.
- Additional image link [additional_image_link] – provide up to 10 additional images per product to help customers see different views of your product.
- Avoid using UTM parameters on image URLs.
- Recommended image size is at least 650×850 pixels (but larger resolutions are always welcome).
Before creating your product feed, don’t forget to browse Google’s documentation explaining how to create product feeds and the product attributes that should be included in the feed.
Tracking conversions from free product listings
On January 31, 2022, Google announced that it enabled auto-tagging for free listings in Google Merchant Center.
You need to turn on this feature in your account by navigating to Settings > Conversion settings. Then, ensure the Auto-tagging button is on.
When a user clicks on one of your listings in Google Search, auto-tagging will add a parameter of “result id” to the URL. If a user clicks on the listing again, the same result id will be used.
Auto-tagging can be used for tracking conversions and purchases from free product listings and free local product listings. Based on this information, you can adjust your strategy and the product inventory.
Product restrictions
Not every type of product is eligible for free product listings.
Google Merchant Center has a pretty strict policy on unsupported content that you will have to review while setting up your free listings.
Below is an overview of the types of products that aren’t allowed, supported by examples:
Examples: Concert tickets, airline tickets, bus reservation tickets
Ticket sales
Vehicles
Financial products
eBooks and digital books (not including audiobooks)
Currency
Open-loop gift cards
Services
Immovable property
Recurring billing
Billing processed by product software
Wrapping up
The setup process of Google Merchant Center product lists requires quite a lot of additional work to get things started.
However, free product listings and the Shopping tab can be your extra sources of organic traffic that will give you an edge over your competitors.
I hope my article gave you a better understanding of these features in Google Merchant Center and you will now be able to make the most of them to drive more sales for your business.
Not sure where and how to get started with Google Merchant Center and Technical SEO audit? Book a discovery call with Onely’s experts today to know more!

Hi! I’m Bartosz, founder and Head of Innovation @ Onely. Thank you for trusting us with your valuable time and I hope that you found the answers to your questions in this blogpost.
In case you are still wondering how to exactly move forward with your organic growth – check out our services page and schedule a free discovery call where we will do all the heavylifting for you.
Hope to talk to you soon!